Tuesday, September 27, 2011

Mmmmmm Apple Pie

In my every attempt to be like Martha, I thought I'd try an apple pie recipe of hers out of her Baking Handbook. I don't recall trying this recipe before, but man did the pictures in her book look good!


First, I went apple picking last weekend! I got some gorgeous Macs and Galas. 


Chris was VERY excited to use our apple peeler/corer for the first time. I think he gave it to me for Christmas last year, but I can't remember. 


While he was working on the applies, I started on the dough. I actually made the dough the night before and put it in the fridge. I got to use my amazing marble dough board! I received this as a shower gift from my aunt and it is awesome, it works so well on pie dough.


I also used these cute little cutout tools. They were so fun!


It looks pretty good. I had Chris take it out of the oven while I was upstairs working on my quilt for the contest coming up soon, but I think I would have left it in for another 5 or so minutes. Some of the leaves didn't have a touch of golden brown on them, although it does look pretty perfect in this picture.


My husband and I are in the ongoing debate of serving apple pie with cheddar cheese or vanilla ice cream. What do you guys think? Ice cream or cheddar cheese?


Holler!

Tuesday, September 20, 2011

Fabric Box Trial (& Tribulation)

So. Remember that post about wire baskets and bins and all sorts of fancy storage for the craft room? Well, apparently it will take me a lifetime to save up enough money for all of the storage bins I need for the craft room. Given that the average bin/basket was like $20, I knew that I needed to come up with another solution. I searched and searched for fabric bin tutorials until I landed upon this tutorial for storage cubes from one of my very favorite bloggers, Crazy Mom Quilts.

I followed the tutorial 100% to the T. 

Step 1: cut out your fabric. 5 6x6 squares of both your showcase fabric and your liner fabric (both heavier weight fabrics).

(Don't you love this geometric pattern? Its very Mediterranean I think. I love it)


Sew the 4 sides of the showcase fabric together:


Do the same thing with your liner fabric. Sew the 4 pieces together. Then sew a 5th to the bottom. 


Sew the 5th 6x6 piece to the bottom of the 4 already shown together for the showcase fabric. NOT THE LINER. NOT THE LINER. NOT THE LINER.
 

 (You should end up with this!)

(Or this!)

For the liner fabric, sew the 5th bottom piece on all the way on 3 of the 4 sides, but on the 4th side, leave 4 inches of unsewn space as marked by the pins. You need this space available to flip the block inside out. Does that make sense? If not, Crazy Mom's instructions are probably better. You should backstitch at the pins because you will be really pulling on these seams later.


You should now have both the showcase and liner fabric all used up. You have used all 5 sides that you cut out. To prep for the next step, keep the showcase fabric right-side-in and the liner fabric right-side-out. Set the liner right-side-out directly inside the showcase fabric.


Pin around the top edges to ensure that the corners of the showcase and the liner both match up.


Sew around the edge you pinned:


Using the 4 inch gap that you hopefully left in the liner, pull the box inside-out. 


Then, cut thick cardboard pieces to measure 5 3/4 square (I think, check back to Crazy Mom). I think that I used a Kashi snack bar box and it was really thick. It worked perfectly. I didn't take good pictures of this process, but fit all of those 5 cut-outs between the two layers of fabric for all sides. You will DEFINITELY need to bend the cardboard in order to fit it through the 4 inch gap. Definite bending occurred here. Don't be scared, just do it. Did I men


Once completed, you topstitch around the entire top of the bin to give it a much more finished look. 


VOILA! Looky Looky I made a fabric bin. 
 

Overall, I really loved this quick and easy sewing project. It was really very very easy.  

I would change things though. I am not sure what or how. But the liner didn't really fit well. I am not sure if that is because its linen which can be a P.I.T.A. or it is something that I did. Anyway, I would like this bin to be stiffer. Has anyone every used interfacing? I never have and I am slightly intimidated. Does anyone know of a fabric bin tutorial using interfacing? If so, can you please share?

I am so excited to finally add a crafting item to my finished projects list. I feel like I haven't actually finished anything in months. Note that there will be more of these in my future. You can see the finished bin picture @ my flickr account. You can also find links to all of my finished projects, food items, and home decorating on my sidebar. Check it out!

Holler

Monday, September 19, 2011

A little fall decor

 Woo hoo!

As part of our upcoming one year wedding anniversary, hubby and I decided to throw ourselves a housewarming party. We just had it this past weekend and it was WONDERFUL!

In anticipation of the party, we got a ton of things done around the house. It was nice because we had a goal, get the house looking proper before the party. Which meant, that box of crap couldn't sit in the middle of the floor for long. Put away that box of crap.

Anyway. This was the first weekend that our house really felt like home. My sister came to town with her boyfriend to help get the place in party mode. We had a fire going in the living room from Friday @ 5:00 through Sunday (and actually still going right now). Everything was finally put into place, no tripping over boxes and bags and stuff. We were almost desperate for this party to get our house together.

In anticipation of the party, I did some flower shopping! I LOVE LOVE LOVE fresh flowers. Now that we have a house, I am going to buy fresh flowers whenever I want because they will have a nice pretty place to sit. Maybe I'll even put some in the laundry room, that might make it a happier place to be. lol. It was funny, because not only did we (my sister and I) make 6 pretty bouquets, but a few people actually brought us flowers as gifts. How lovely! The picture below is a collection of all flowers after the party.


Here are our favorite bouquets. They are just soooo pretty. Don't they kind of resemble the Garden Party quilt that I blogged about before? Hmm... I must be attracted to these jewel tones.


 In my daily attempt to be Martha, I bought tons of gourds and tiny little pumpkins to decorate the house with. The big gourds seen below held the french doors open that  connect the dining room and the screened-in-porch. It really looked fantastic. I tried to decorate our mantle with all of the gourds after the party was over. Here is my attempt.


Look at that gorgeous fire!

Hubby has literally been planted in front of the fireplace since we started all of these fires. He refuses to even sit on the couch.


Is anyone else getting their houses into fall-mode? Are you LOVING it? I should have taken pictures of the cutest little ornamental pepper plants that we put on our front steps. So cute.


Holler!

Monday, September 12, 2011

Remember this quilt?

Ok. So do you remember this quilt that I started a while back? Well, I jumped right back into quilting this baby once I learned of this contest that the Modern Quilt Guild is throwing (having? hosting? launching?). 
The general gist of the rules:
1) A quilt design completely made by you (can be inspired by other things though)
2) Has to be quilted 100% by you (no sending it out to get quilted)

There will be 3 winners. Each winner gets quite a few different prize packages. Kona Cotton Fabrics. Aurifil thread. Entry into a drawing for a new Janome quilting machine. Lots of goodies.
I am not sure that I can be classified as a modern quilter or not. I am not sure what a modern quilter really is. I mean, quilting is like ancient right? My quilt pattern is essentially one big log cabin block, which is pretty much as traditional as it gets.

Anyway, I finished the quilt top back in May. Time for the backing. When I decided to enter it into a contest, I knew that I had to give the backing more thought. I bought a few yards of the print below. It is in the front of the quilt as well. It is from Anna Maria Horner's Garden Party collection (where most of the fabric comes from for this quilt). 

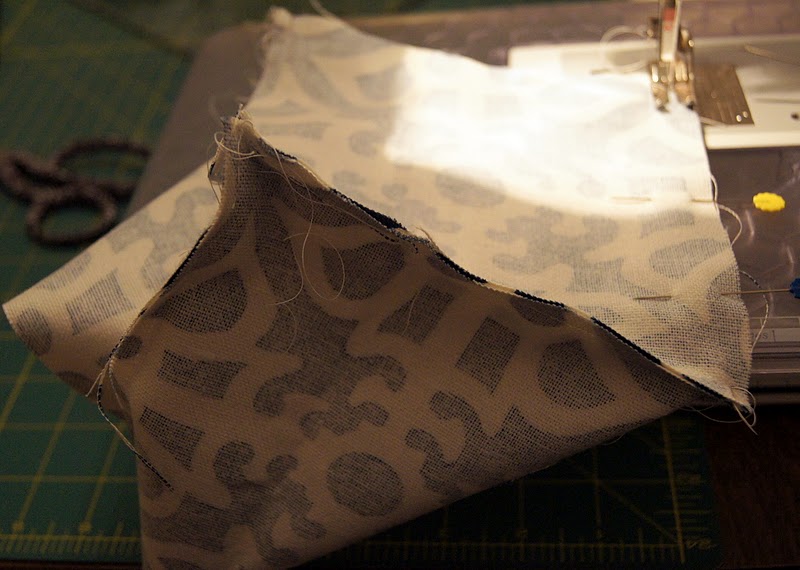
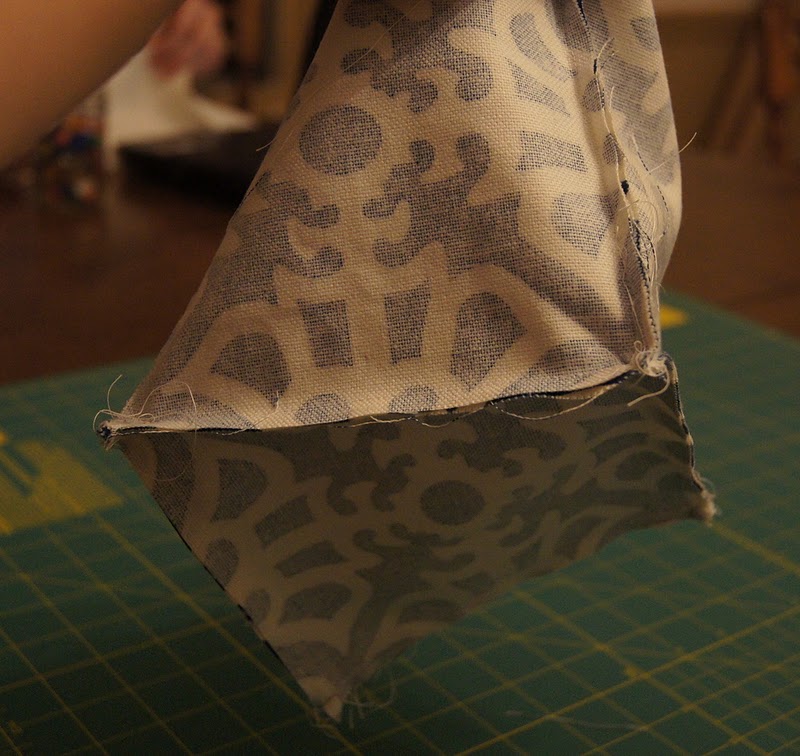
I also got to use my pinking rotary cutter. Well, my rotary cutter with the pinking blade. For some reason, I always thought that by using the pinking blade I would mess up my seam allowance somehow. But it doesn't. 


I hope that its not too hard to picture, but this is what I envision for the quilt back. So each of the yellow AMH print strips will be 10.5 inches wide x the length of the quilt (75 inches). The combination of all the colored strips sandwiched in between are 6.25 inches. Given that, the combo below will be repeated 4 times. I think it will look really good! 


Of course, that meant I had to cut 1.25 inch strips .... weeeee! that was fun! (not).


What do you think?? Can you envision? Do you think that the back flatters the quilt top?


Ok. Back to quilting. I have about 15 days to get this baby done. 

Any quilting suggestions? Any and all are appreciated. 

Holler. 

Thursday, September 8, 2011

The definition of LABOR Day

I didn't spend my long weekend frolicking in the sand or basking in the sun, no, I spent it with my foot pedal to the floor sewing my heart out. 

My in-laws bought us a set of patio furniture that they found at a garage. It was in very good condition (had clearly never even been outside) but it needed new cushion covers (not new cushions). 


The cushions were still in good shape and we were definitely able to reuse them. We were also able to reuse the zippers from the previous covers, which was AWESOME. My mother-in-law pointed out that they were probably only used once. Haha, duh! 


We went to a home decor fabric store and ordered some fabric. We ordered 3 prints. One for the sofa, one for the set of end chairs, and another for the rocker. 


I reallllllyyyyy love this fabric! 


I really truly almost changed my blog name to Pinning My Life Away... I have literally never pinned this much in my entire life. 1/2 of the cushions needed to be eased are the corner, so I pinnnnnnedddddd.


 And pinned...


and pinned.....


But all that pinning lead to some gorgeously rounded cushion corners Woohooo!


After 1 NONSTOP day of sewing.... we ended up with all of these:


After 2 days of nonstop sewing (and zippering, and pinning, and bleeding) we ended up with all of these:


After all of that pinning and sewing and zippering and pinning and sewing and zippering I neeeeeeded something to boost morale:


This was  my mother-in-law's station. She was the true mastermind behind the whole project. I have never made a cushion of any kind. She drew out all of the patterns on craft paper, took all of the measurements, and went through all the real "thinking it out" that this project involved.  I truly just sewed as I was told. 


Why do cats want to sit on everything important to you?


While we were sewing our hearts out, our men we're painting the furniture a nice hammered black. It was previously a dark green color.


The biggest problem that we/mainly my mother-in-law ran across was with the geometric fabric. She is a perfectionist (yes, you are) and wanted to make the circle run through the center of the bottom and top cushions. This involved some major fussy cutting on her part. But look, it worked out perfectly!


Once all of the paint dries and I get final screened-in-porch photos all taken, I will show you!

OH! - did I mention that they found all of this furniture for $50? Also, did I mention that it is a 7 piece set that includes 1 sofa, 2 chairs, 1 rocker, 2 end tables, and a coffee table? Yeah, what a good find! 


Holler! 

< Edited to Add > You can see this completed project as well as my other projects by viewing my flickr account here. You can also use the links on my sidebar to view all of my projects!